Uploading Files
Follow the given procedure to upload files in
a specific folder:
- Open
the Collection Folders & Files screen by clicking on the
 button
at the top of the screen.
button
at the top of the screen.
- Select
the Collection from the drop-down present at the top left-hand
side of the action bar to view the folders and files under the Collection.
- Once the
Collection Folders & Files screen
appears, select the folder (single-click on the respective folder)
where you want to upload a file from the Collections
Folder section (left-hand side grid).
- Click on
the
 (Upload Files button) to start
the uploading process. The following screen appears,
(Upload Files button) to start
the uploading process. The following screen appears,
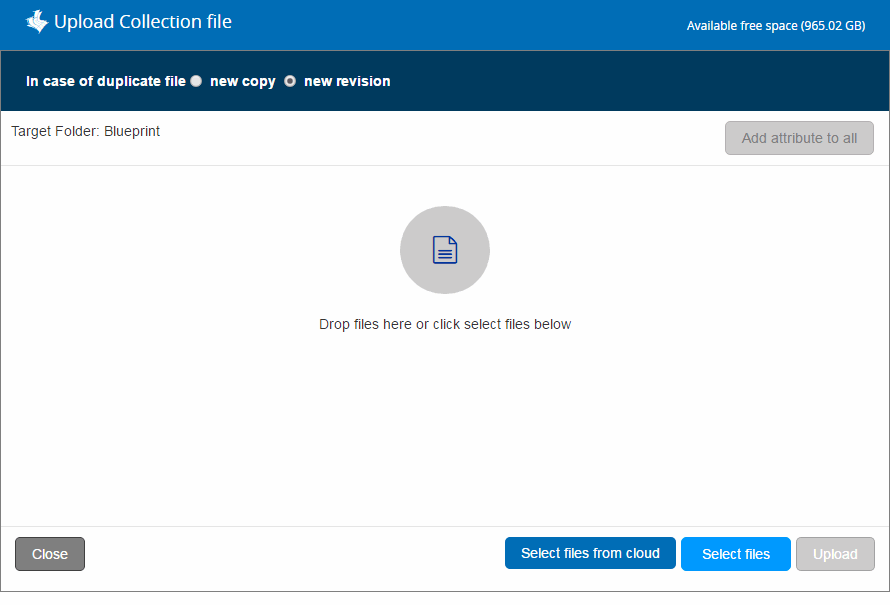
- Select New
Copy or New
Revision in case you are uploading a duplicate copy
of the same file.
- Tick the Allow
file content search checkbox to make the file searchable
by the application (to be displayed in search results) after the files
are successfully uploaded.
- Click Select
Files to select the file(s) to be uploaded from your
local computer. Alternatively, click on Select
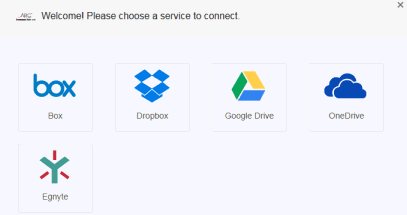
files from cloud button to upload files from any third
party cloud application which hosts your files. The screen through
which you can connect to any cloud service is shown below,
- If you are selecting files to be
uploaded from your local computer, then select the files from your
local computer via Choose
File to Upload dialog box and then click on Open. The file(s) gets
added waiting to be uploaded. This is shown below,
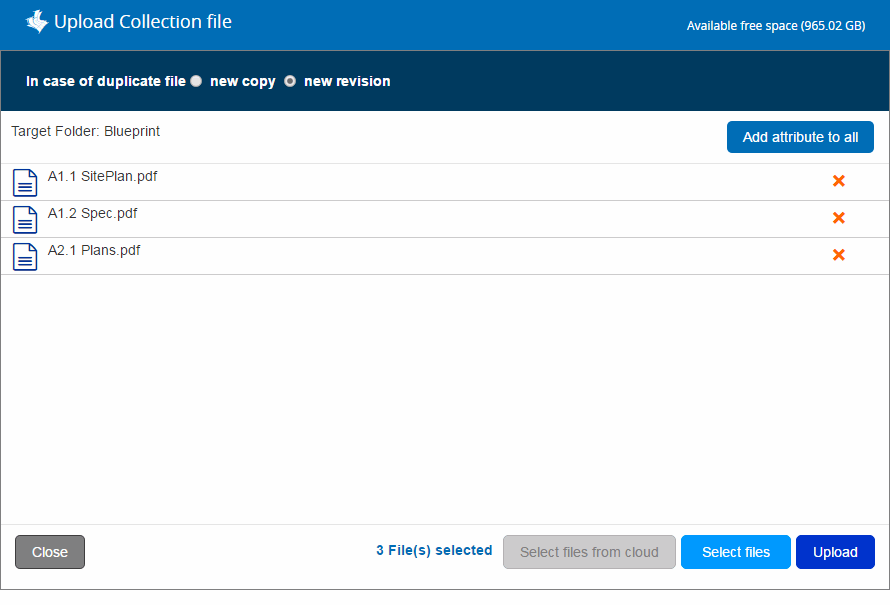
- If you want to add attribute for
each file then click on Add
attribute to all button. Refer to Add/Modify
Attributes help file for more details.
- Click Upload
to upload the file(s). The process of uploading starts. This is shown
in the screenshot below,

- You can click on
 button anytime (before
the file gets uploaded) to remove the file instance from the application.
button anytime (before
the file gets uploaded) to remove the file instance from the application.
- After the completion of uploading
process, the successfully uploaded file will be displayed in green
and the files which have failed to get uploaded will be displayed
in red.
- Click Close
to exit.
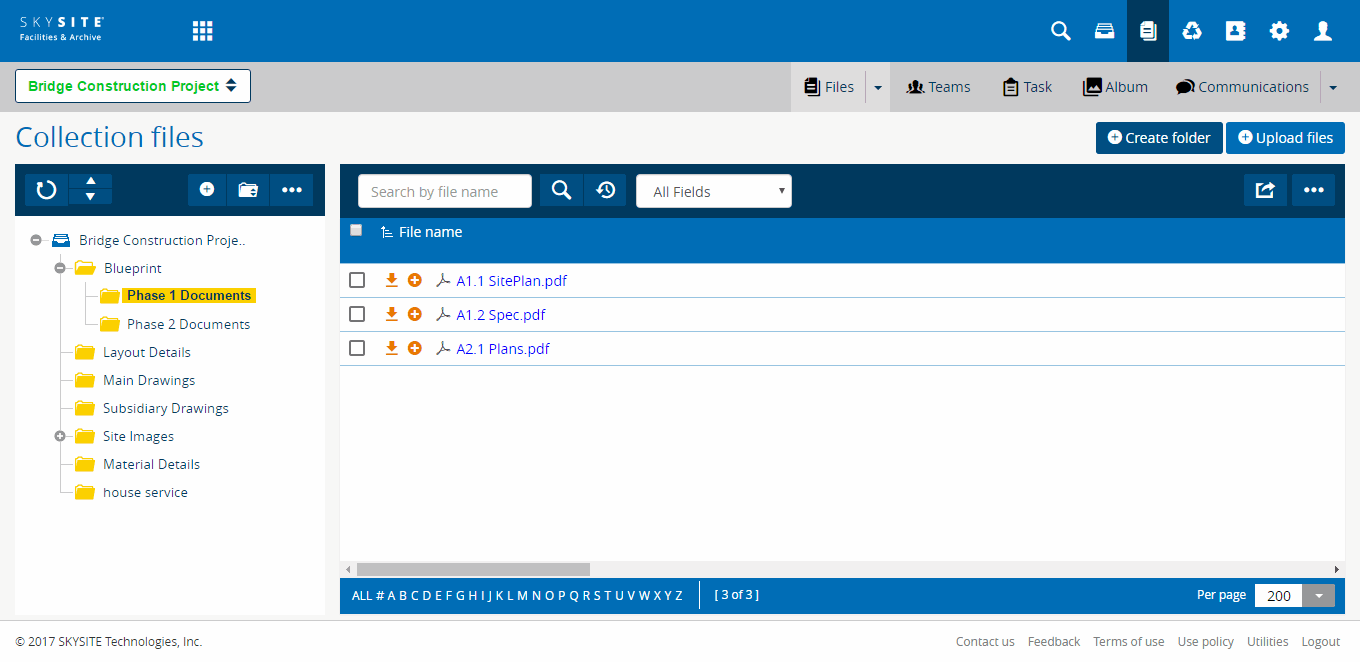
- Click the folder where you have uploaded
the files. The files will display in the Collection
Files section within the selected folder.
- Click Close
to exit.
- Click
 (Refresh button) at
the top of the right side file display grid to view the files under
the right-hand side file display grid.
(Refresh button) at
the top of the right side file display grid to view the files under
the right-hand side file display grid.
The successfully
uploaded files will be displayed within the respective folder on the right-hand
side grid [concerned folder and files
within the folder are highlighted by a red rectangle in the screenshot
below]. This is shown below,
Links:
Accessing
& Understanding Collection Folder & File Screen
Manage
View
Copying
Files
Moving
Files
Linking
Files
Deleting
Files
Downloading
Files
Checking
Out Files
Checking
In Files
Undo
Pending Changes
Viewing
Document History
Viewing
Files
Manage
File Permission
Add/Modify
Attributes
Setting
Alert for Folder/File
Searching Files