Click
on  button at the top right-hand corner of the screen to access the Settings Main Menu. This menu is
displayed below,
button at the top right-hand corner of the screen to access the Settings Main Menu. This menu is
displayed below,
Follow the procedure below to access the Account Settings screen:
Click
on
button at the top right-hand corner of the screen to access the Settings Main Menu. This menu is
displayed below,
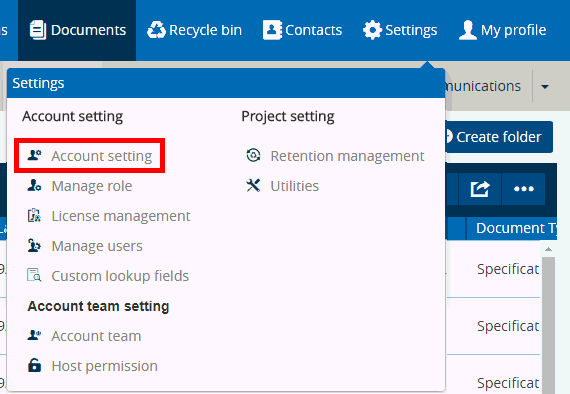
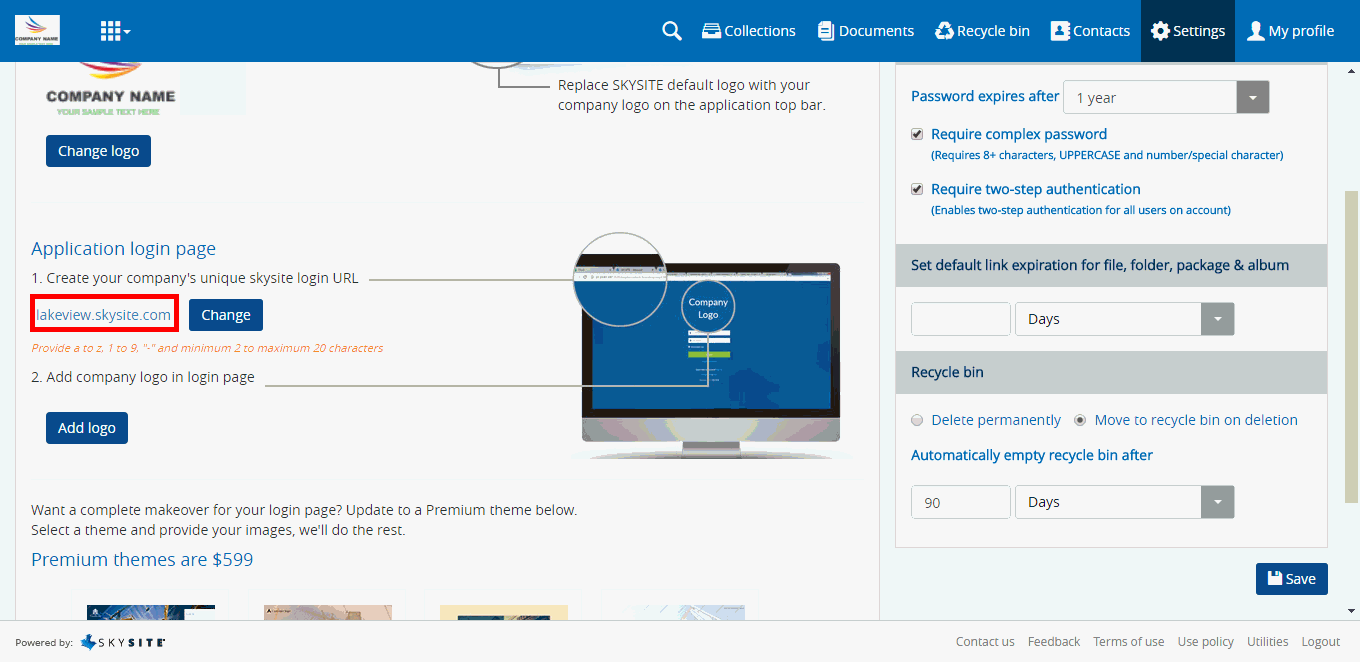
Under the Account Setting heading click on Account Setting menu item [highlighted in the screenshot above] to access Account Settings screen. This screen is shown below,
Before proceeding to perform activities on this screen select the Collection for which you will be configuring the account setup.
Activities which can be performed from this screen after selecting the appropriate Collection:
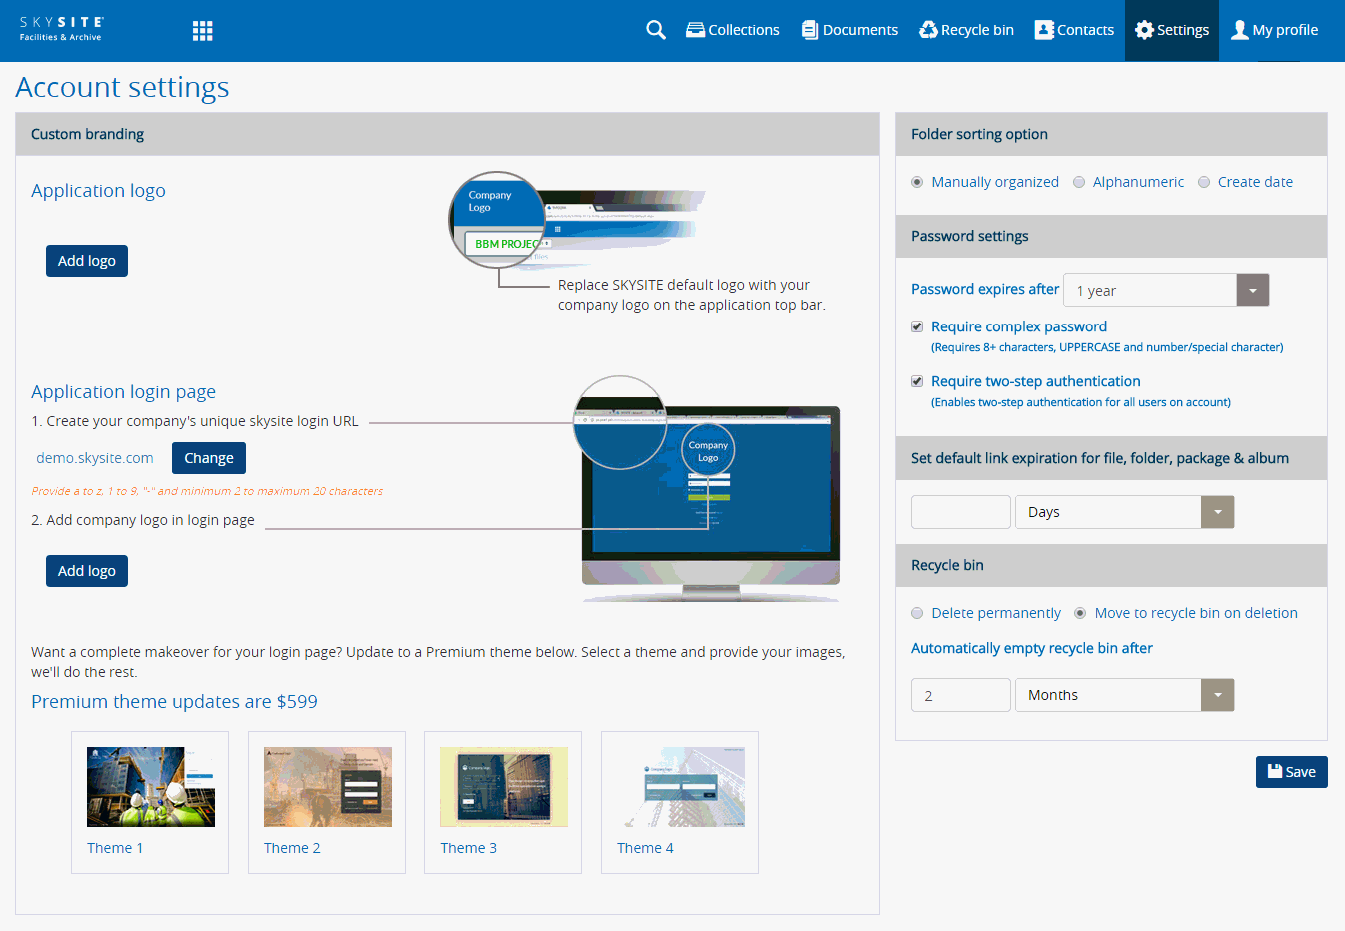
Custom Branding: User can incorporate an account logo, a company logo and change the login URL to a custom URL from this section.
User can upload a custom account logo (preferably company logo) and view on the left-hand side of the application top-bar after logging in to the application.
User can upload his/her company brand logo and view that same on the SKYSITE log-in screen.
User can create a custom URL (custom domain) like ({custom}.skysite.com) and access the SKYSITE application (reach the SKYSITE log-in screen) using that custom URL.
User can buy customized log-in screen themes with ‘Contact Us’ option.
User can create custom URL and upload company logo/application logo from both SKYSITE Projects and SKYSITE Facilities & Archival. Creating custom URL & uploading the company logo/application logo in one module of SKYSITE is sufficient. For example, if user created the custom URL & uploaded the company logo from Facilities & Archival, then he/she does not need to repeat the same process from Projects and vice-versa. User can change or delete the company logo and account logo as well as can modify the custom URL from any of the modules.
Click [Add logo] button to add an application logo
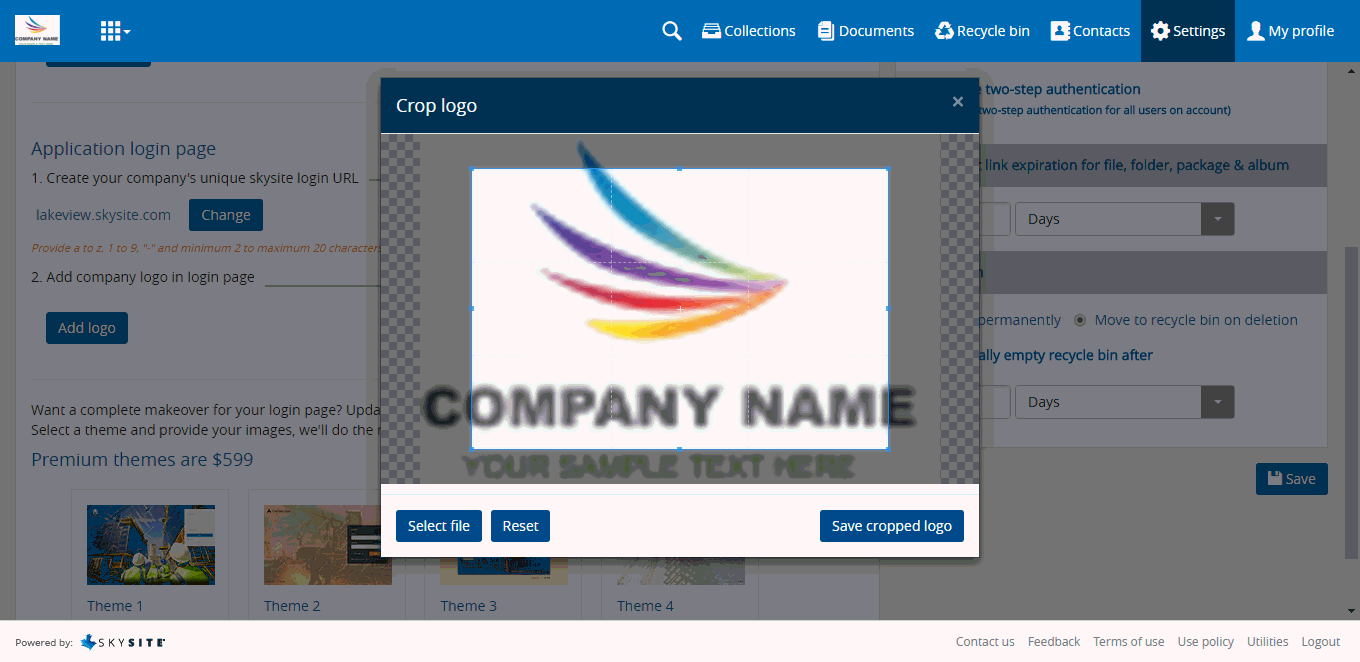
The logo image selection dialog box appears. This is shown in the screenshot below,

6. After selecting the image, click [Open] button on the dialog box to upload the logo image on the logo image cropping pop-up screen.
Note: Only JPG, JPEG, PNG, BMP files are supported. TIFF files are not supported.
Screenshot displaying the logo image cropping pop-up screen:
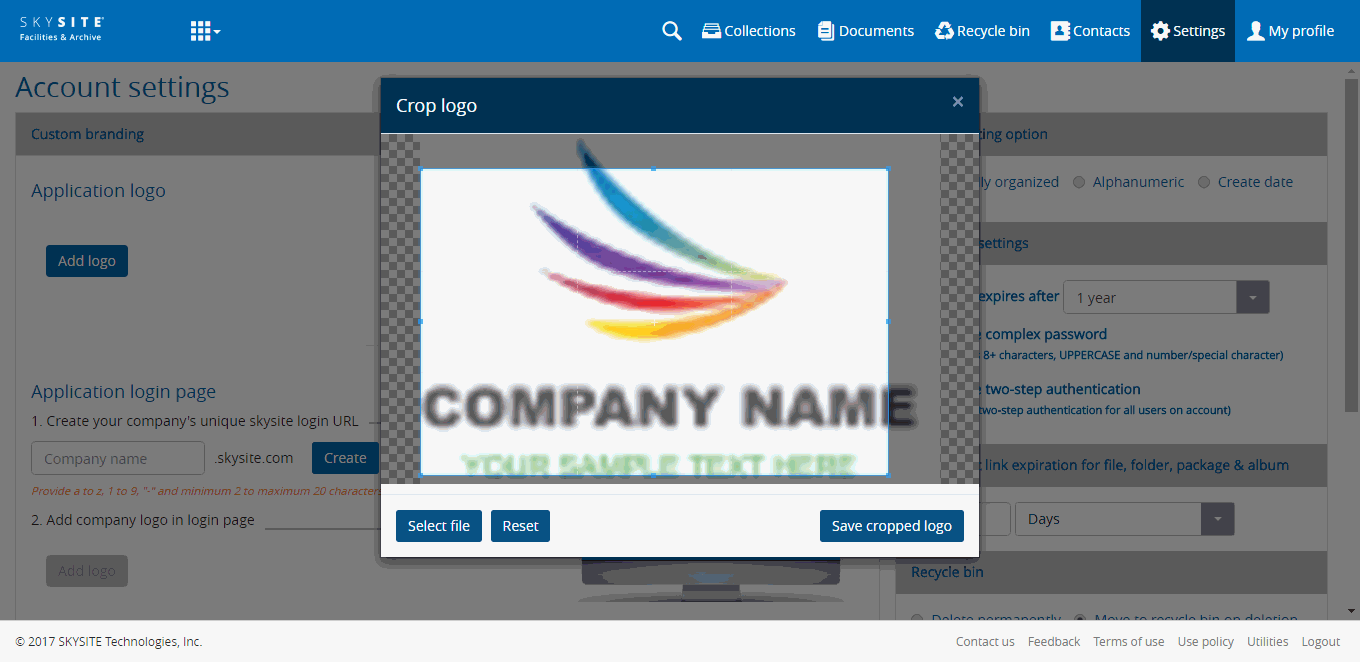
Crop the image as per your requirement by dragging the blue dots at the end the rectangular box placed over the image outward & inward.
Click [Save Cropped Logo] button to save the cropped image as your account logo. Application displays this logo on the top left hand corner of the application top bar
Alternatively, click [Select File] button to select a different logo from the local system
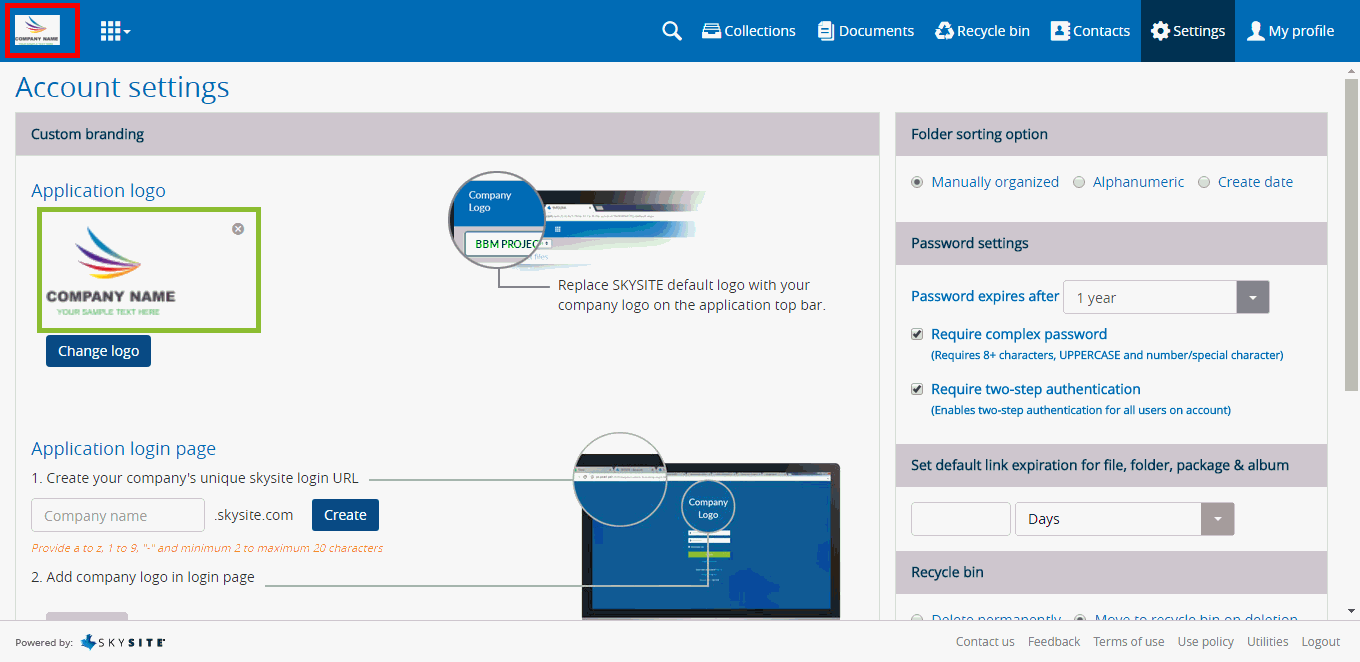
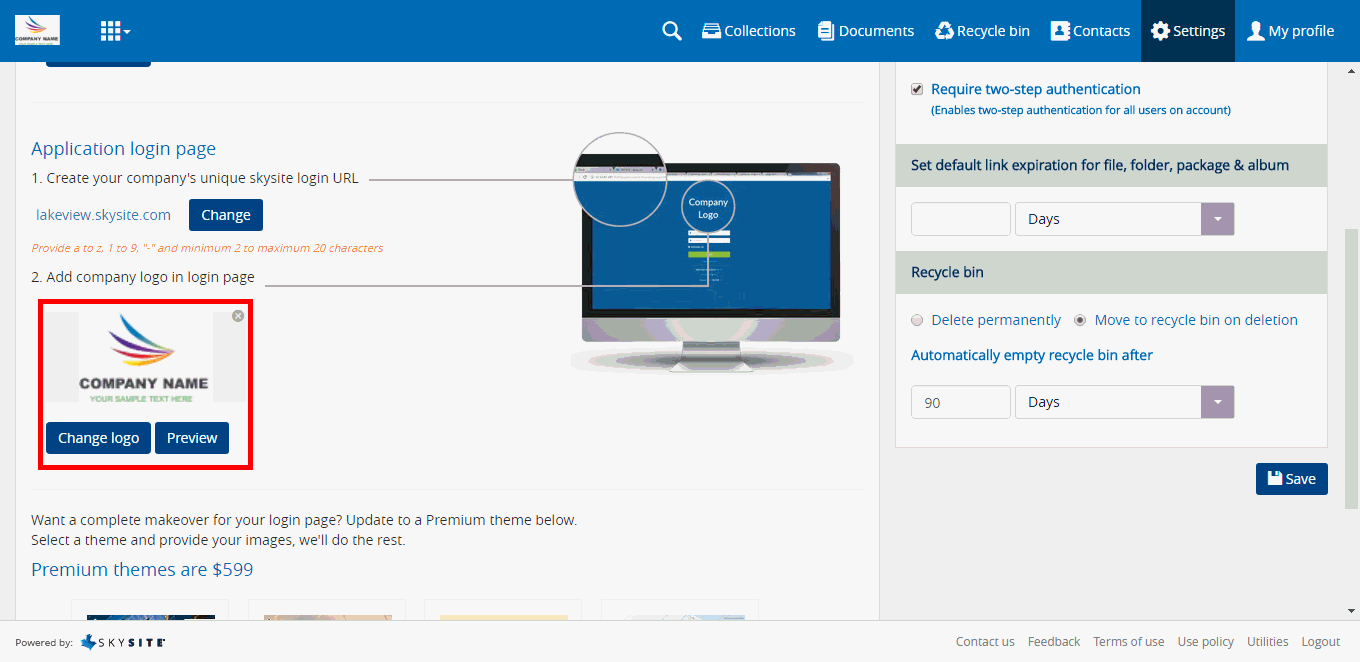
Screenshot displaying the account logo on the left-side of the application top bar [highlighted using the red rectangle] and the same logo as selected under the Application logo section [highlighted using the green rectangle]:
Click [Change logo] button to select another logo from the local system instead of the current logo
Click on the cross sign at the top right-hand corner of the logo to remove the logo
Workflow of creating custom domain & uploading company
Enter the custom domain name in the textbox called Company name and click [Create] button
Say, the user entered the company name as ‘demo’; hence the application will generate the new custom URL for accessing the SKYSITE application as https://demo.skysite.com
Note: Please provide only alphanumeric (a to z, 1 to 9), dash (-) and minimum 2 to maximum 20 characters and no special character is allowed. Only account owner or secondary owner can make the changes.
A pop-up box will appear asking the user for domain confirmation.
2.
Click [Yes] to freeze the newly created custom domain and continue with uploading a fresh company logo on the SKYSITE log-in screen.
Screenshot displaying the demo URL [highlighted using the red rectangle]:
Alternatively, click [Change] button to edit the custom URL.
Application enables the company logo addition button only after custom URL is created successfully.
1.
Click [Add logo] button to proceed adding the company logo
The logo image selection dialog box appears.
2.
After selecting the image, click [Open] button on the dialog box to upload the logo image on the logo image cropping pop-up screen.
Note: Only JPG, JPEG, PNG, BMP files are supported. Application does not support TIFF files.
Screenshot displaying the logo image cropping pop-up screen:
Crop the image as per your requirement by dragging the blue dots at the end the rectangular box placed over the image outward & inward.
Click [Save Cropped Logo] button to save the cropped image as your account logo. Application displays this logo on the SKYSITE application log-in screen in place of the SKYSITE default logo.
Alternatively, click [Select File] button to select a different logo from the local system.
Screenshot displaying the added logo:
Click [Change logo] to select another logo from the local system instead of the current logo
Click on the cross sign at the top right-hand corner of the logo to remove the logo
Click [Preview] screen to view the logo on the SKYSITE application log-in screen
Screenshot displaying the company logo on the SKYSITE application log-in screen [highlighted using the red screenshot] and the custom URL [highlighted using the green rectangle]:

Next time, when user logs in to the application using the custom URL he/she will be able to view the company logo on the application log-in screen instead of the default SKYSITE logo.
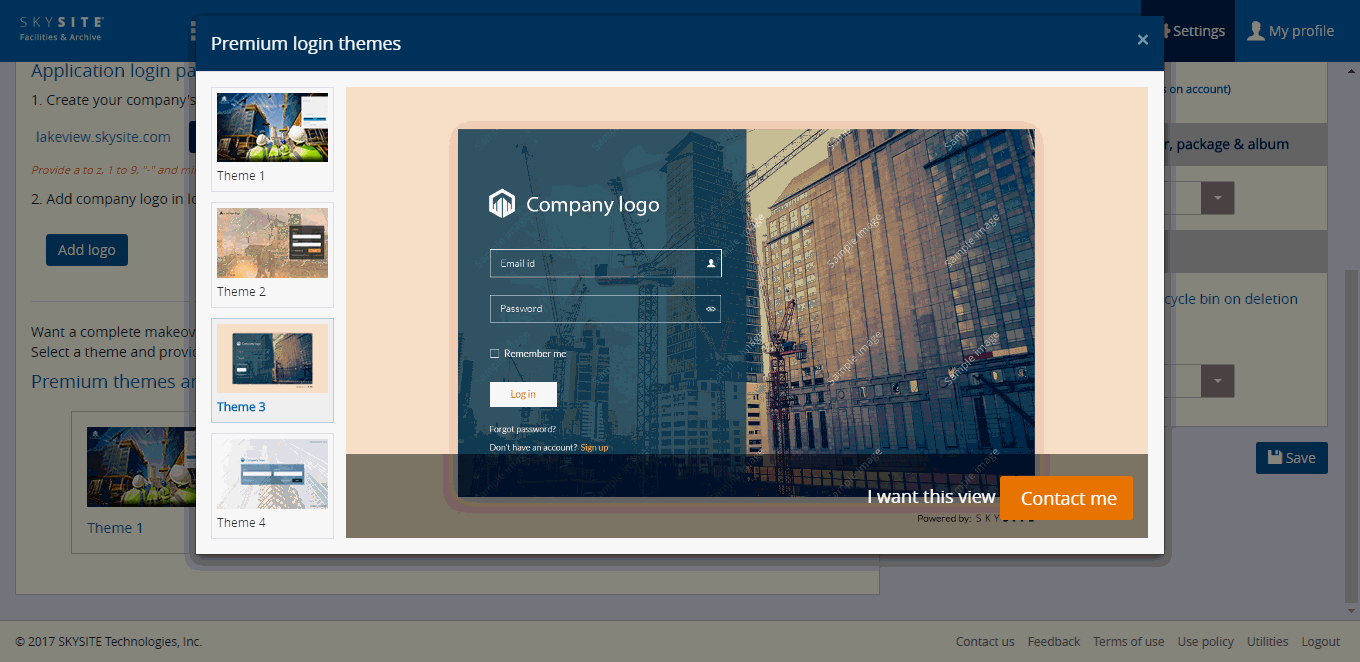
Customized login screen with 'contact us' option:
This is a paid feature and $599 is charged to the customer for choosing to use a custom landing page.
Application provides 4 different type of customized SKYSITE landing page templates. Customer will select one of the templates and provide their own images and content. SKYSITE team will deploy the landing page for the customer.
Screenshot displaying the template landing page selection screen:
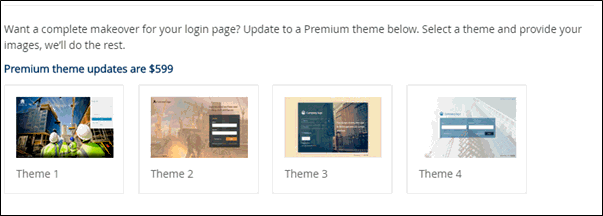
Click on any of the themes to view the themes.
Screenshot displaying the selected theme in larger view:
Recycle Bin Settings: Recycle bin can be operated from this screen. You can select either of the radio buttons Delete permanently or Move to recycle bin on deletion. If you select Delete Permanently radio-button then any collections, folders, files, images, communications etc. once deleted will be removed permanently from the application. On the other hand, if you select Move to recycle bin on deletion radio-button then any folders, files once deleted will be moved to the Recycle Bin folder. Also, you can enter the number of days or months (from the Automatically cleanup recycle bin section) after which the folders/files present in the recycle bin will be permanently purged from the Recycle Bin, thereby from the application.
Refer to Accessing & Understanding Recycle Bin Screen for more details.
Password settings: You can select the number of days after which the account log-in password expires or select to make the current password never expire. You can enable complex password and/or two step-authentication to force the user to enter a complex password and a PIN number to access the application.
Folder Sorting: You can choose to display folders on the tree structure present on the left-hand panel of the Collection Files screen as well as on other screens whereever the folder tree structure is displayed by,
Manually Organized: If you select this radio-button, the folder structure will appear as per the sequence of upload, or sequence of creation within the application. For example, if Folder A, B & C are uploaded one after the other, then the Folder A will appear first in the tree structure and after that folder B & C will appear. Again, if you create a new folder D within the application using the Create Folder function on the Collection Files screen, then that folder will appear after (below) folders A, B & C.
Alphanumeric: If you select this radio-button, the folder structure will appear one after the other according to the alphabetical order of the names of the folder i.e. folders with name starting with letter 'A' will appear first and folders with name starting with letter 'Z' will appear last.
Create Date: If you select this option folders will be sorted as per the date of creation. Folders created first will appear before folders created at later dates.
The folder sorting option here (in the Account settings screen) will override the folder sorting option on the Collection Files screen.
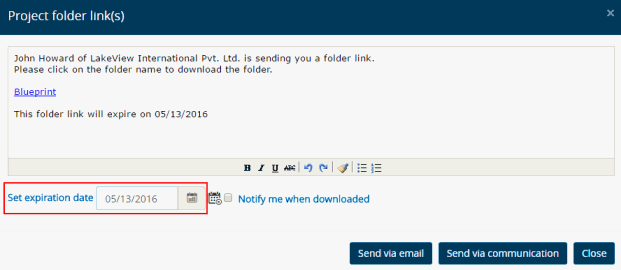
Set default link expiration time for folder, file, package & album: You can enter the number of days, weeks, months or years, crossing which download link to access file, folder, package and album will expire. The entered number of days (or weeks, months, years) will be considered by the application as the default for Link Folders, Link Files, Share Album & Link Document Package functionalities unless expiration date is set during individual link sharing process.
Screenshot below displays the Set Expiration Date field on the Collection Folder Link(s) screen which can override the default number of days after which link will expire in the Account Settings screen:
In the end, after configuring the setup, click on [Save] button to save the settings.