On the Collection Communication screen,
from the action bar, click  (Add
New Communication icon). The New
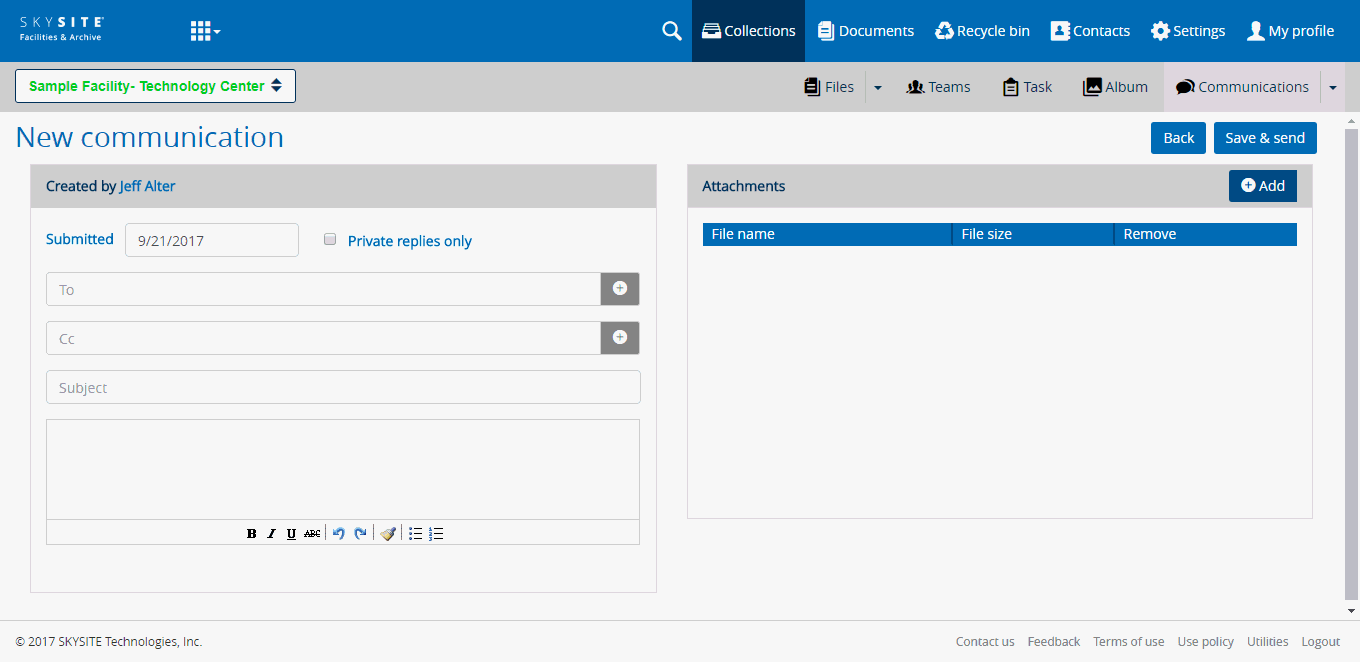
Communication window appears. This screen is shown below,
Follow the given procedure to add new communication:
On the Collection Communication screen,
from the action bar, click  (Add
New Communication icon). The New
Communication window appears. This screen is shown below,

At the top of the screen is displayed the application-name of the user who is creating the Communication. Then on the Message section, the Communication Submission date is given. This date signifies the current date i.e. the date on which the Communication is being created. This date cannot be changed as it is synonymous with the current date, that is, the system date. Also, tick Private Replies only textbox to make the reply from the recipient of the communication visible only to the sender of the message. Leaving this unchecked will create a forum style communication where all recipients will see all responses.
Click  button to select multiple
recipients in the To selection-box.
The Select Recipient(s) screen
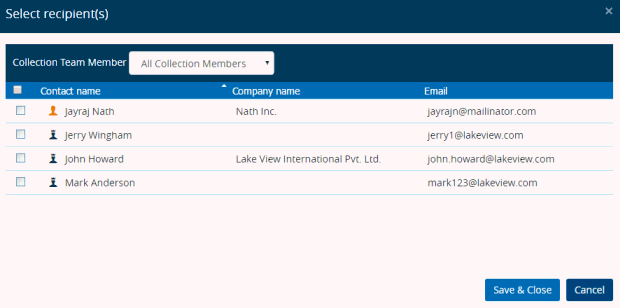
opens up. This screen is shown below,

You can either choose to select recipients out of all Collection Team members or from out of any specific team member. Select All Collection Members or specific team members from the Collection Team Member drop-down displayed at the top of the screen. Depending on your selection the members of the selected team will be displayed in the grid view below.
Select the team members whom you would like to add as recipient by ticking the checkbox beside each chosen member and then click either [Add] to add the selected members as recipient or click [Add & Close] to select member as recipients and also close the window simultaneously.
Similarly, add one or more team members in the CC field. The selected team members email ID will be displayed in the To & CC field, respectively.
Enter the subject of communication in the Subject text box.
Enter the message in the Message text editor.
Under the Attachments section, click  button
to search and include attachment in the application. Two options will
be displayed, Attach from your computer
and Attach from your Collection.
If you click Attach from your computer menu item then a dialog box appears through which you can browse, select, upload and then attach the file to your Communication Message. Details can be found here: Uploading Files.
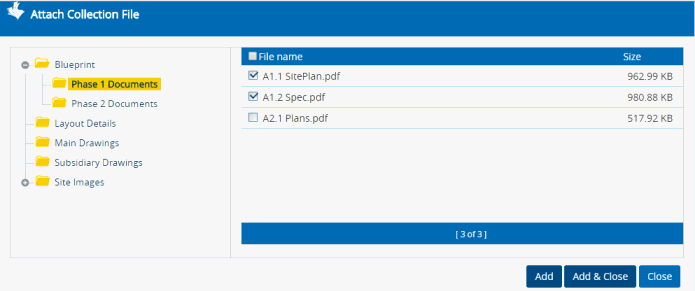
If you click Attach from your Collection, then the Attach Collection File screen opens up,

Select specific folders to view and select the respective files under the folder on the right-hand side of the screen. Select the file(s) and then click [Add] to add the selected files as attachment or click [Add & Close] to add the selected files as attachments and also close the Attach Collection File window simultaneously.
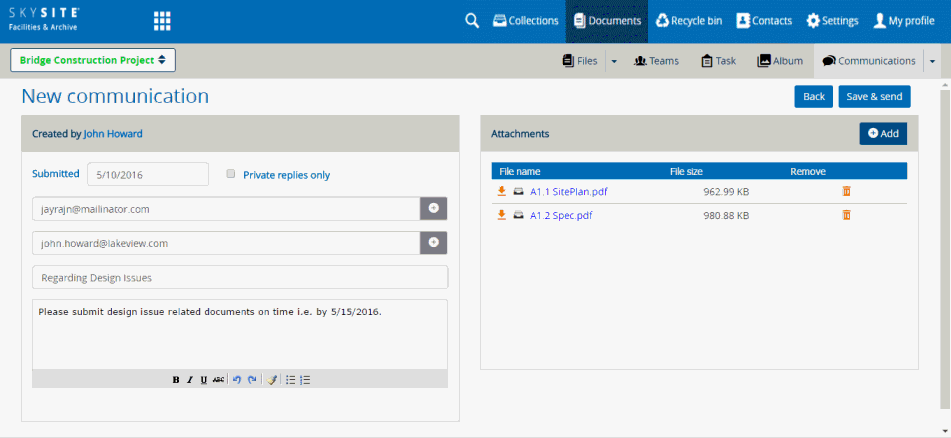
After attaching the files is completed you will be able to view the File Name & File Size of the attached files, download the files, view the file in the application Viewer and remove the file from the attachment section.
A completed Communication message with Attachment is shown below,

Click  (Save & Send button)
to create and send the communication message to the intended recipients
The newly created Communication will be displayed under the Communication List View grid section on the Collection Communications screen. The newly added Communication is shown in the screen below,

Links:
Accessing & Understanding Communication List Screen
Editing & Resending Communication