Modifying Collection
Follow the given procedure to modify a Collection
Information:
Open Collection
Home screen.
Select the Collection Category (Active, Favorite,
Inactive or Archived Collections). The list of Collections of the
selected Collection category will be displayed in the grid section
in a row-wise format.
On the grid section
click on  button beside any Collection to modify the Collection information.
Only if you are a Hosting User will
you be able to edit the Collection information.
button beside any Collection to modify the Collection information.
Only if you are a Hosting User will
you be able to edit the Collection information.
On the opened up
Edit Collection screen you
will be able to modify information under the Collection
information tab, Invitation
tab, change owner of the Collection under Collection
Owner tab (once you choose a new owner the edit privileges
will pass from you to the new owner) & associate on or more Account team with the Collection.
You will also be able to change the Collection status via the Current Collection
status drop-down under the Settings
tab. The Collection status can be changed from Active
to On Hold or Complete.
If the Collection status is changed to On
Hold then the Collection is moved from Active
category to Inactive category.
Again, if the Collection status is changed to On
Hold then the Collection is moved from Active
category to Archived category
The Settings tab is shown
in the screenshot below, 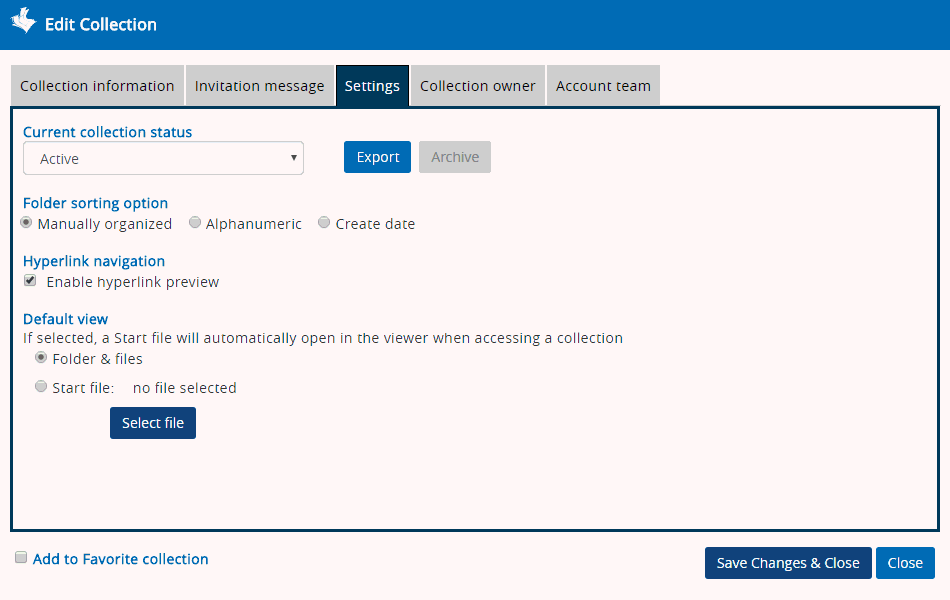
Click
on Export button to download
the Collection information into your local system. The following screen
opens up as shown below,
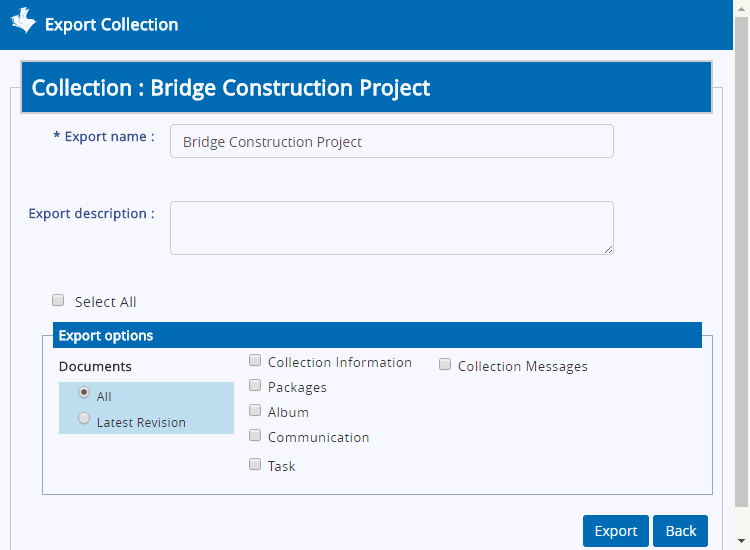
Mandatorily
enter a Export scheme
name. You can enter a description if required.
You
can choose to download all documents existing in the Collection
by selecting All
radio-button or only revised version of those documents by selecting
latest Revision
radio-button under Export Options
section.
Also,
you can choose to selectively download some elements of the Collections
(shown in the screenshot above) by ticking the checkboxes beside
each element. Again, tick on Select
All checkbox to select all elements to download at one
go.
Click
Export button to download
all he contents.
Select
the folder sorting option by Manually Organized (as & when the
folders within the collection are added), by alphanumeric (alphanumeric
character), by create date on which the collection has been created
(starting from the folder which has been created first).
Click
the checkbox Enable hyperlink preview to enable
the Hyperlink Navigation
preview screen when navigating from one document to the destination
document through the hyperlink drawn on the source document in the
application Viewer. This checkbox
remains clicked by default.
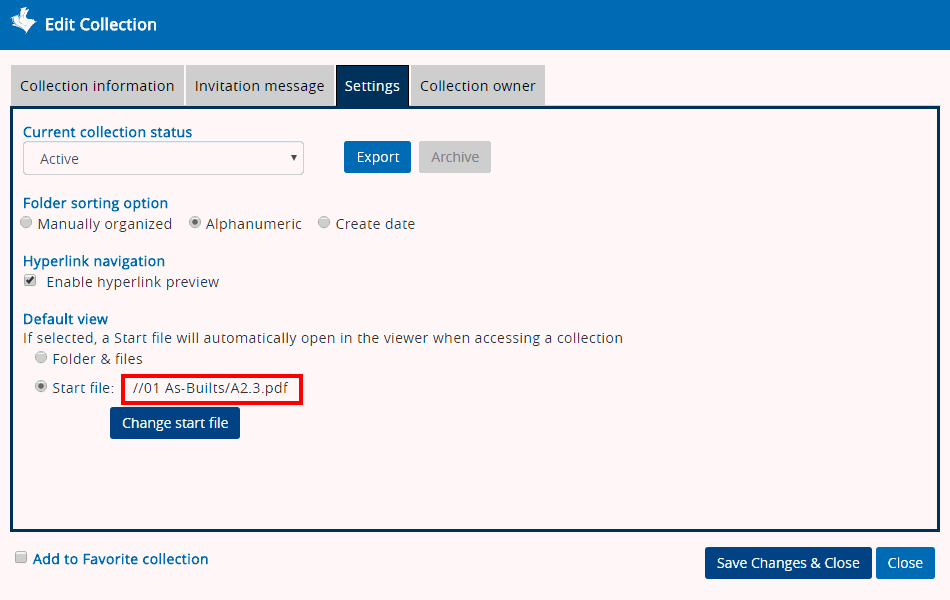
Default view: User can now
directly land on the Viewer
screen to view the document of his/her choice instead of the Collection
files or Collection
list screen, after logging into the SKYSITE F&A application.
To view a document of his/her choice on the Viewer screen, directly
after logging into the SKYSITE F&A application, user must select
the Default
view as Viewer
from the Edit
collection pop-up screen.
Note: By default, the Folder
& Files radio-button will remain selected. This means that if
this radio-button is selected then user directly land on the Collection
files or Collection list screen (depending on the Preference) for the
first time after logging on to the F&A application.
The file selection menu will appear.
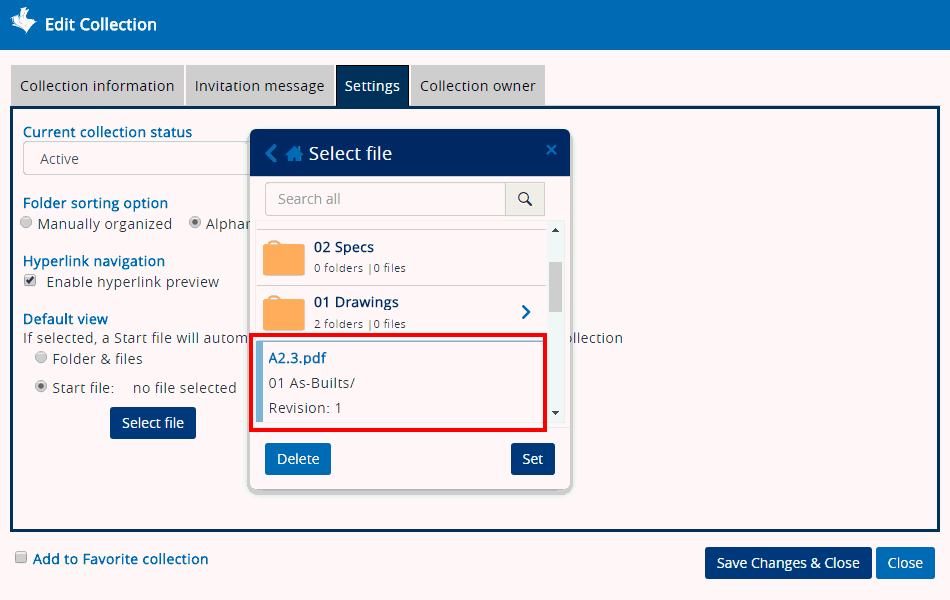
The
path
to the selected file is displayed under the Start
file radio-button.
Click
[Save Changes &
Close] button to save the changes as well as close the
Edit
collection pop-up screen
Log-out
of the application
Now,
log-in to the SKYSITE application
Click
the [Go to Facilities
& Archive] button on the Common landing
page
User will directly land on the
Viewer screen displaying the selected document through the Default view section
on the Edit
collection pop-up screen.
Links:
Accessing
& Understanding Collection Home Screen
Adding New
Collection
Searching
Collections
Exporting
Collections
Viewing
Activity Reports